| ��� 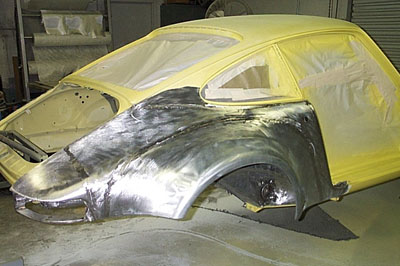
We
previously saw the RSR's fender flares being welded in place. In this photo the
finish welding is complete and the entire surface has been ground down smooth
and cleaned up, inside and out. This looks simple but was actually quite an involved
and careful fitting/welding process. 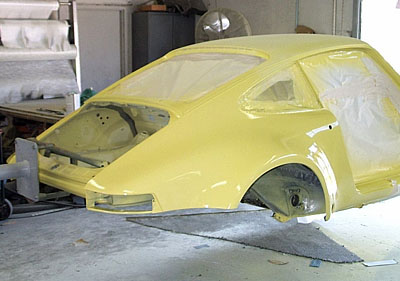
The
first primer coat has been sprayed over the new fenders. The car looks a lot more
like a race car now that the huge RSR flares are in place. When this coat is dry
the entire area of the fenders/flares will be sanded, and another primer coat
sprayed on to reveal any remaining imperfections, similar to the way the interior
and bottom were previously finished, those areas now being perfectly smooth and
already wearing their finish coats of paint. 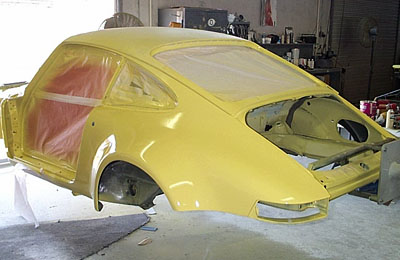
The
other side... 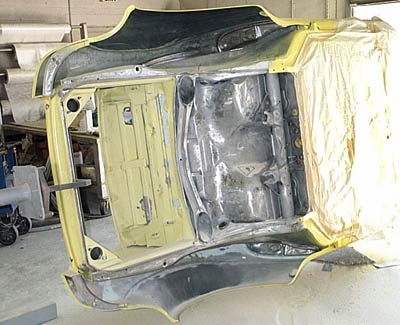
The
bottom of the car, once so worn and banged-up, is now a showcar perfect, and so
has been completely protected with paper and tape while the insides of the big
RSR fender flares and the inside of the engine bay are lightly bead-blasted prior
to getting their own coats of primer and paint. 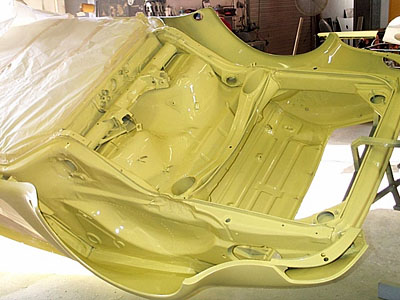
All
fender and engine bay areas are now fully primed... 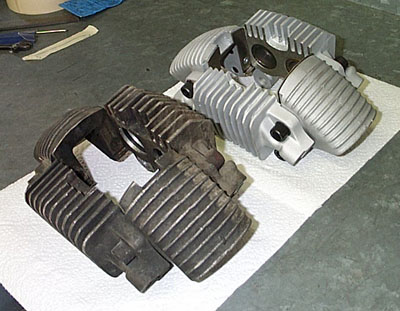
A
dramatic before-and-after photo, showing the brake calipers for the RSR. The calipers
themselves are magnesium. Andy is working on rebuilding the brakes, and what he's
starting with is the one that looks black, but is actually just very dirty and
very used. The caliper is first disassembled to its component parts (see below),
then the four magnesium castings are chemically cleaned and then bead-blasted.
Amazingly, once they've been blasted they're a very nice silvery color. The cleaned
magnesium castings are sprayed with a dull clearcoat finish to seal the surface
and help preserve them. New bolts are used to screw all the cleaned parts back
together. 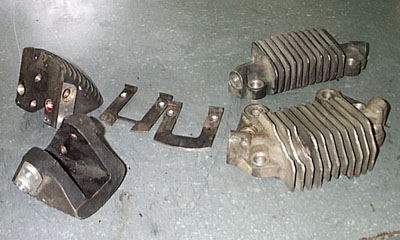
The
caliper fully disassembled and ready for cleaning. Even though some of these dirty
parts look like they're painted black, where they've been disassembled (note two
parts at left, above) you can see the silvery finish of the clean metal. Also
note that some of the cooling fins have been damaged. In this case we just clean
up those edges with a file so that they're smooth and straight. In the top photo
of the rebuilt caliper you can see where some of the cooling fins have had damaged
edges repaired and filed off smooth. The two brackets in the center of the photo
above (and visible in the assembled calipers) are the pad stops. The little "ears"
on the ends prevent the brake pads from falling through the bottom/inside of the
caliper. A spring clip holds the pads in place at the top/outside once they've
been inserted. 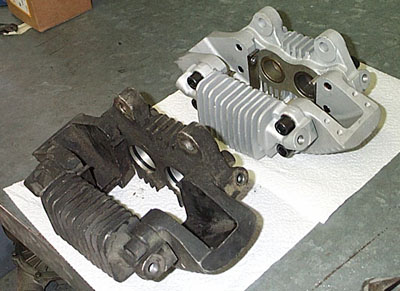
This
is the underside of the same two calipers. The dirty black-looking one will soon
be just as perfect as the one at top-right. Here you also see the housings for
the pistons, which fluid pressure force against the pads, pushing them against
the spinning brake rotor, slowing/stopping the car. <<<
Previous Update | Next Update >>> |